Creating Schedules
- Creating a Schedule
- Navigate to the Accounts tab
- Select the account(s) to add to a Schedule
- Right click > Schedule
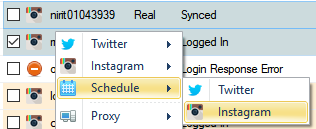

- Navigate and click the task to be scheduled
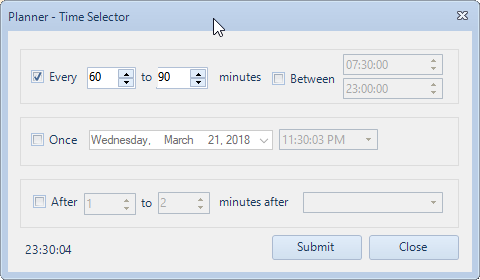
- A) Check Every to run every set amount of minutes
- Optionally check Between to set time windows that tasks can only run between
- B) Check Once to run only once at a set time
- C) Check After to run after another schedule has finished
- Checking Schedules
You can check the status of your scheduled tasks on the Schedule tab

- Name - The name you gave a Schedule when you create it
- Task - The type of function the Schedule is setup to run
- Options - The various options related to that specific Task
- Time - The time left until the Schedule will run next
- Status - The current status of the Schedule
- Command Bar
You can perform schedule related actions from the command bar

- Create - Create a new Schedule
- View - Views Schedule information
- Run Now - Runs the selected Schedule
- Toggle - Toggles the Status of the selected Schedule
- Delete - Deletes the selected Schedule
Created with the Personal Edition of HelpNDoc: Produce Kindle eBooks easily